Shop Tips
Template Sections
Creating a Featured Products or Newly Added section
Dealing with designs that can fit in more than one section
Moving and Importing
Avoiding broken links - moving, importing and deleting considerations
Editing / Replacing images
Disable Right Click?
Template Sections
Creating a template section can solve several problems
- Setting consistent prices
- Easily placing images on the pocket or shoulder.
- Avoiding tediouse resizing.
- Setting consistent product organization.
- Ensuring all products are created.
To use a template section:
- Create sample images that are your standard dimensions.
- Create a hidden section. Name it template1.
- Put products in the hidden section.
- Organize the products the way you want them.
- Set your prices.
- Add the sample images to the desired location on the products. Re-size any as you want them.
- Now when you create a new design:
- Take the section that is set up perfectly
- Click the copy button
- Click on the section
- Click the Section Info tag
- Change the name of the section
- Change the section teaser
- Change the section description
- In the Defaults section change the default product name and description - even if you use your own pricing scheme set one of the default pricing schemes so you will never have zero markup.
- Now click the Section contents tab
- Click the Select All check box and next to it in the drop down click Change Name - enter the name of the new design
- Click the Select All check box and next to it in the drop down click Change Description - enter the description for the new design
- Click the check box in the corner of each product that uses the same image. From the drop down choose Add/Change Image. Select the new image and apply.
- Repeat for the differently shaped images.
- Sometimes it is more efficient to import from a template section rather than copy the entire section
- Don't skip the step of filling in the defaults for the new section. It won't make any difference for the products you just imported but it will simplify your life when new products are offered and you need to add them.
This process works best if you tend to use a consistent image size. When you change the image for another it will be applied at the size it is replacing. For example, If you take your 3000 x 3000 pixel image and manually resize the image to cover 8 inches, then if you import that product into a new section, then add/change image the new image will also be applied at 8 inches.
Creating a Featured Products or Newly Added section
Maybe you want to have a section that highlights products that are seasonal, or have a special promotion, or draw attention to your newest additions. The typical solution is to create the special section and then either create the products there, to be moved later, or import or otherwise duplicate designs that are already in other sections in the shop. A better solution is to create your products in the single most logical section, then create your special section. Inside the special section you can use sub sections to display the design thumbnail. When the visitor clicks on the thumbnail they get redirected to the actual section with the products. See this "Newly Added" Example. Click on any design, then check the "bread crumbs" path and you will see you are in an entirely different area.
Dealing with designs that can fit in more than one section
Quite often you will have a design that fits the theme of more than one section. Let's say I have one section on pets, and another on wildlife. And I have a picture of a kitten with a butterfly on its nose. Should I create duplicates so that them image is in both sections? Generally duplicating products is not the best solution. It creates more work in maintenance and management. This especially becomes a problem when there is a change, like the introduction of new products. Then you have twice the work. Also duplicate products will be displayed in the marketplace. This can be confusing for the customer. A better solution is to designate one subsection to hold the actual products. So I might create a kitten subsection under the pets section. And then I create another subsection under wildlife. And that new subsection will be empty, except that in the section description I'm going to put a redirect code that goes to the kitten section.
Moving and Importing
You can change the original location of your sections or products by either moving them, or importing them. Move applies to both sections and products. You can only move within the same shop, but you can move either sections (and their entire contents) or products. Import applies only to products. You can import one or more products into any section of a premium shop from any other shop (premium or basic).
Moving just changes the location of the section or product, it does not create a new copy. In most cases that is what you should use (see broken links considerations). After a move is done the section or product will no longer be in the old location. You can move more than one section or product at one time by using the bulk tools.
- The new location must exist before you begin your move.
- Navigate to the page that shows the sections or products to be moved.
- Select the sections or products to be moved by clicking the box in the upper left corner or clicking Check all items.
- Click in the box next to Make Changes To Checked Items Below.
- Select "Move Items", Click Go.
- Navigate to your existing section and click on it.
Importing creates a new set of products. You cannot import the section descriptions, thumbnails, subsections or defaults, only the products in the section. After an import is done the originals are still in their old location. Copies are in the new location. You can use the bulk tools to import more than one product at a time.
- Start in the location where you want to import the items into. Where you want to see the products.
- Click Import
- Navigate to your existing section
- Select the products to import or all
Click Import
Avoiding broken links - moving, importing and deleting considerations
Moving vs Importing - MOVING sections or products keeps the same URL so does not kill the link. IMPORTING products creates a copy, so it is a different URL, and so not the same link. DELETING a product after you import it will kill the deleted link since the imported one is not the same product number.
As a general guide, look at the product / section / store URL - the address that shows in the browser title bar. Then test - if that URL doesn't change then your link hasn't broken.
Changing a store name breaks links. How can you tell? Look at the URL - see the store name there? Since the store name is in the URL changing it will break the link.
When you look at a section or a sub section or a sub sub section check out the URL, for all of them there is no difference in the path. They all have storename/sectionnumber There is no information in the URL that tells its relative position in the store. So if you MOVE a section the URL will stay the same, the link will not break. Test it. Create a test section, check the URL, move it, check the URL. The same is true of products. Import is different from move. Import creates a copy - no links would go to the new version but the old won't break unless you delete them.
Product names and section names do not appear in the URL so changing those things won't break a link. Create a test product, check the URL, change its name, check the URL. 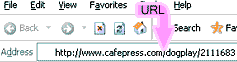
Changing a product image is less obvious because you don't normally see the image URL in the address bar. Changing a product image won't break links to the product, but it will break links to the design. I can, for example, create a link based on the image number that will take a customer to the marketplace page that shows all the products that use that particular image. If you remove that particular image from the products then the design link is useless. shopkeepers have requested the ability to choose to "replace" an image rather than "change" it for that and related reasons. But that isn't here yet so change images with caution. You might decide to just add the new version as an alternative, or keep a few products with the old image in the hopes that someone will follow the link back to your shop and find the newer.
Nothing outside your own account knows anything about your image basket so change that around as much as you like.
If I decide that I don't like a design I rarely delete it directly, at least not once it has been available for several weeks. Instead I move it to a hidden section. That keeps the link intact but moves it out of the visitor's path to reduce clutter. Then when I later have a new design in the same general topic area I will go back to that retired section, replace the old design with the new one, and move the section back to its appropriate location. I do this instead of retaining the old design because the size of your shop does affect your ability to do some updating tasks, so no need to keep stuff you really don't like. Just take advantage of existing links instead of needing to build new ones.
Editing / Replacing images
Different PODs have different strategies when it comes to editing and replacing images. In Zazzle, for example, at least in February 2008 if you want to change the image you have to create an entire new product. And there is nothing you can do about any external links to the existing product with the old image. If you delete the product any existing links will break, if you don't delete the product you have no means of pointing the customer to the new one. In Printfection you can replace an image on a product and retain links to the original product. As of February 2008, however, there was no means to do this on all products in a section at the same time. In CafePress, as of February 2008, you can replace an image on a section's worth of products all at the same time. The new image will go on in the same placement and relative size as the original (this is the basis for creating the section templates). You cannot, however, replace one image with another throughout the entire shop, just one section at a time. The product link will remain the same, and the links will be unbroken. There may be a slight delay (a couple days) before the marketplace updates.
In general your designs will look better if you create them to fit the product. For example, although the round buttons can very often take a resized square image your efficiency and the look will be improved if you create a separate image for the button. So not only is it faster to create a separate image, but it also usually results in an improved product.
Disable Right Click?
A question often arises is how to install a right-click disable script. The thinking is that it will stop (or at least slow) image theft. It really doesn't. Overall such scripts will do your business more harm than good. Who needs to right click to take an image? Alt+prt scr (print screen) isn't bothered by the script. Or just go to your web cache and drag the image in to a folder, no right click required. Or use any of a number of screen capture programs. Disable right click just annoys people who want to "save bookmark" "send a link" "go back" "reload" "open in new tab" "open in new window" plus a number of add on functions for right click.
More Tips
Read Your shop isn't making sales? A crash course in setting your shop up for success.
http://forums.cafepress.com/eve/forums/a/tpc/f/722104/m/73610187
And do the work. You get out of it what you put into it. It takes a long time to get a new business off the ground (a year or more), and you have started with the HUGE advantage of only needing to spend your TIME to do it. Make use of that opportunity.
|

